
Setup: Runpod and Dolphin 2.5

Dear Reader,
Before you dive headfirst into this guide, do yourself a favor and check out this link: https://erichartford.com/dolphin-25-mixtral-8x7b. It's not just some random babble; it's your primer on the myriad ways to run Dolphin 2.5. Got it?
Good.
Now, let's cut to the chase. You're not here for a gentle stroll through tech specs and buzzwords. You want the real deal, the hardcore, full-throttle experience of Dolphin 2.5. And that's exactly what I'm going to show you – how to set up an instance on Runpod.
*Note: I personally don't even like Runpod due to their pricing structure. Use any service you see fit. I suppose I am more indifferent to it.
Remember, in the world of tech, it's not just the fancy jargon that counts. It's the real-world application. Testing, not just tech specs, reveals the truth. So, let's get down to business and set up a Runpod instance and try it out.
Why Runpod? I had credit laying around and I've used this service before, I may try out other services in the future.
There is a lot to get through here, so I've added a checklist near the end. Think of it as a lifeline, something to cling to in the vast sea of confusion.
Template
First things first, you've got to navigate to the 'templates' tab. This is where the magic begins. Look for 'TheBloke Local LLMs One-Click UI.' Sounds fancy, right? Well, it's because it is. It's not just any template; it's your ticket to setting up your instance quickly with a little finesse. Click "Deploy".

Selecting an instance
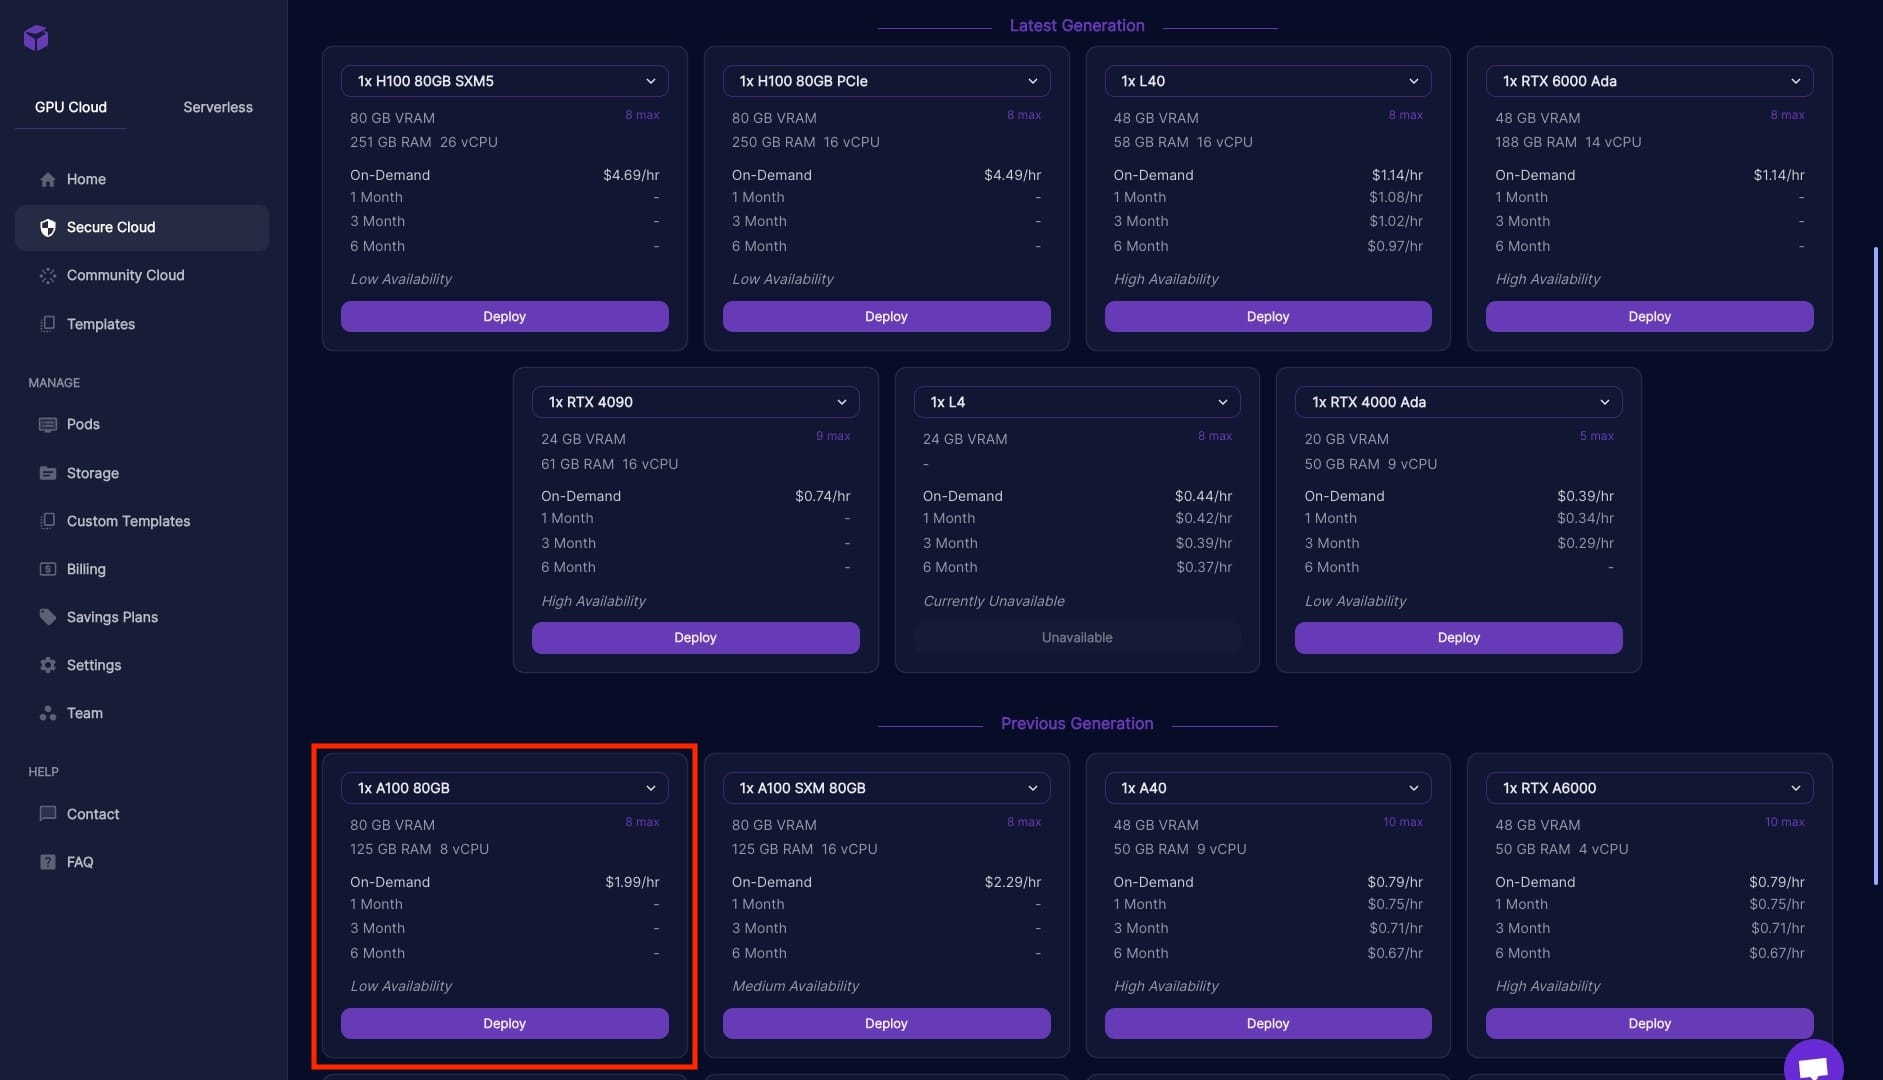
Next up, it's decision time. You've got to pick an instance setup from the cloud. Now, pay attention here, because this part is crucial. We're not playing around with any watered-down, non-quantized versions of Dolphin 2.5. No, we're going for the full experience, the whole enchilada.
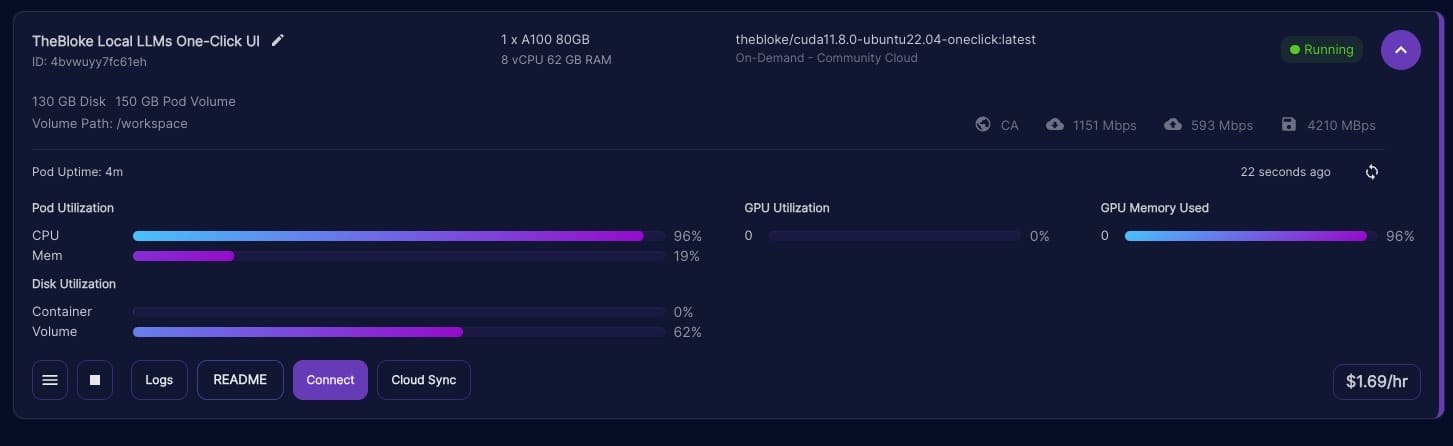
What does that mean for you? You need power, and lots of it. Think atleast 'A100' kind of beefy. I took a whirl with the RTX A6000 (48GB Vram) setup, and let me tell you, it was a disaster. We're talking hideously slow, the kind of slow that makes you want to pull your hair out. And the GPU? It was gasping for air, almost maxed out just firing up the model. 0/10, would not recommend. To reiterate we will be running it 16 bit and that makes even the a single A100 feel sluggish but usable.
Now, don't get ahead of yourself thinking you're done with the instance setup. There's more. It's time to beef up the disk size – because, let's face it, 'just enough' is never enough in the world of tech. You want to be sure, doubly sure.
So, what do you do? Simple. Click 'edit' and crank up that disk size to 130GB or more. Increase both "Container Disk" and "Volume Disk".
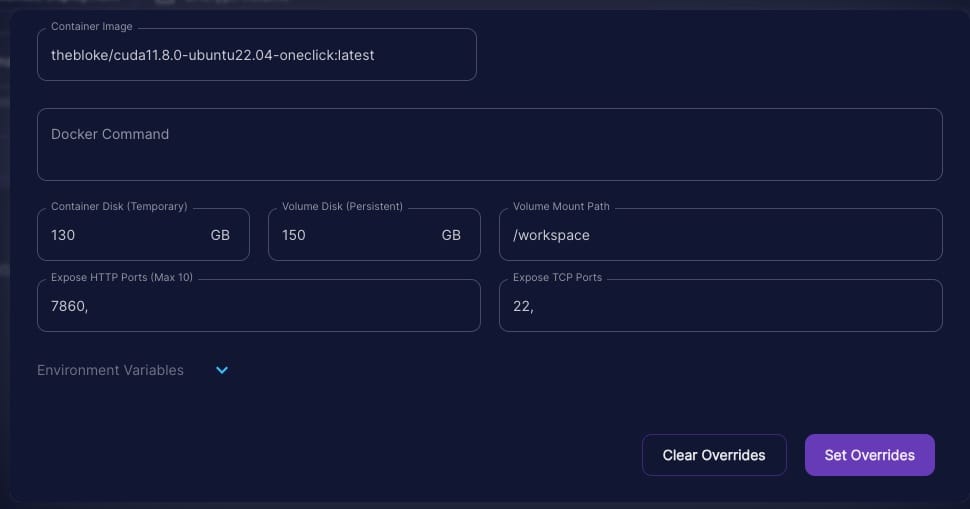
Note: An Environment variable setup here maybe bypass a later step where I set --trust-remote-code manually, but I have not tried it that way but it's worth a shot.
Accessing the server instance
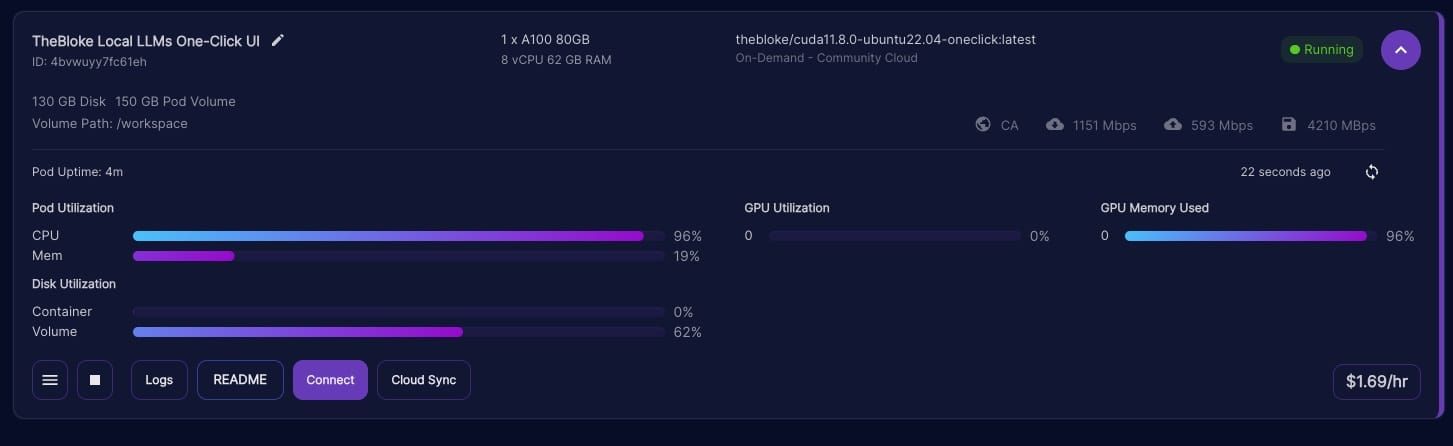
So, you've set your settings and deployed your instance. But don't start celebrating just yet. There's more to do and we are burning cash.
Now, expand the section and click on 'connect.' This will pop up a modal. From there, you'll see the 'Connect to HTTP Service [Port 7860]' button. Give that a click, and it'll launch the web GUI in a new tab. Like opening a window to a whole new world.
But wait, there's more. You also need to click on the 'Start Web Terminal' button. This will fire up the command line. Why? Because you will need both the GUI and the command line. After that 'Connect to Web Terminal' should become enabled so make sure you click that which will open the CLI in a new tab.
Downloading the model.
Once your instance is up and running, don't just stand there admiring it – we've got work to do. It's time to download the model, and we're doing it pronto.
Head over to the WebGUI. See that 'modal' tab at the top? Click it.
Now, you'll find a text box in the 'Download model or LoRA' section. Here's where you get specific. Type in ehartford/dolphin-2.5-mixtral-8x7b. Hit the 'Download' button and... wait. Yes, wait. There's going to be a delay, and you won't have a fancy progress bar to stare at. It's like sending a message in a bottle and waiting for a reply.
But don't worry, I won't leave you hanging. In the next step, we'll check on the progress because suspense is fun, but knowing what's actually happening is better.
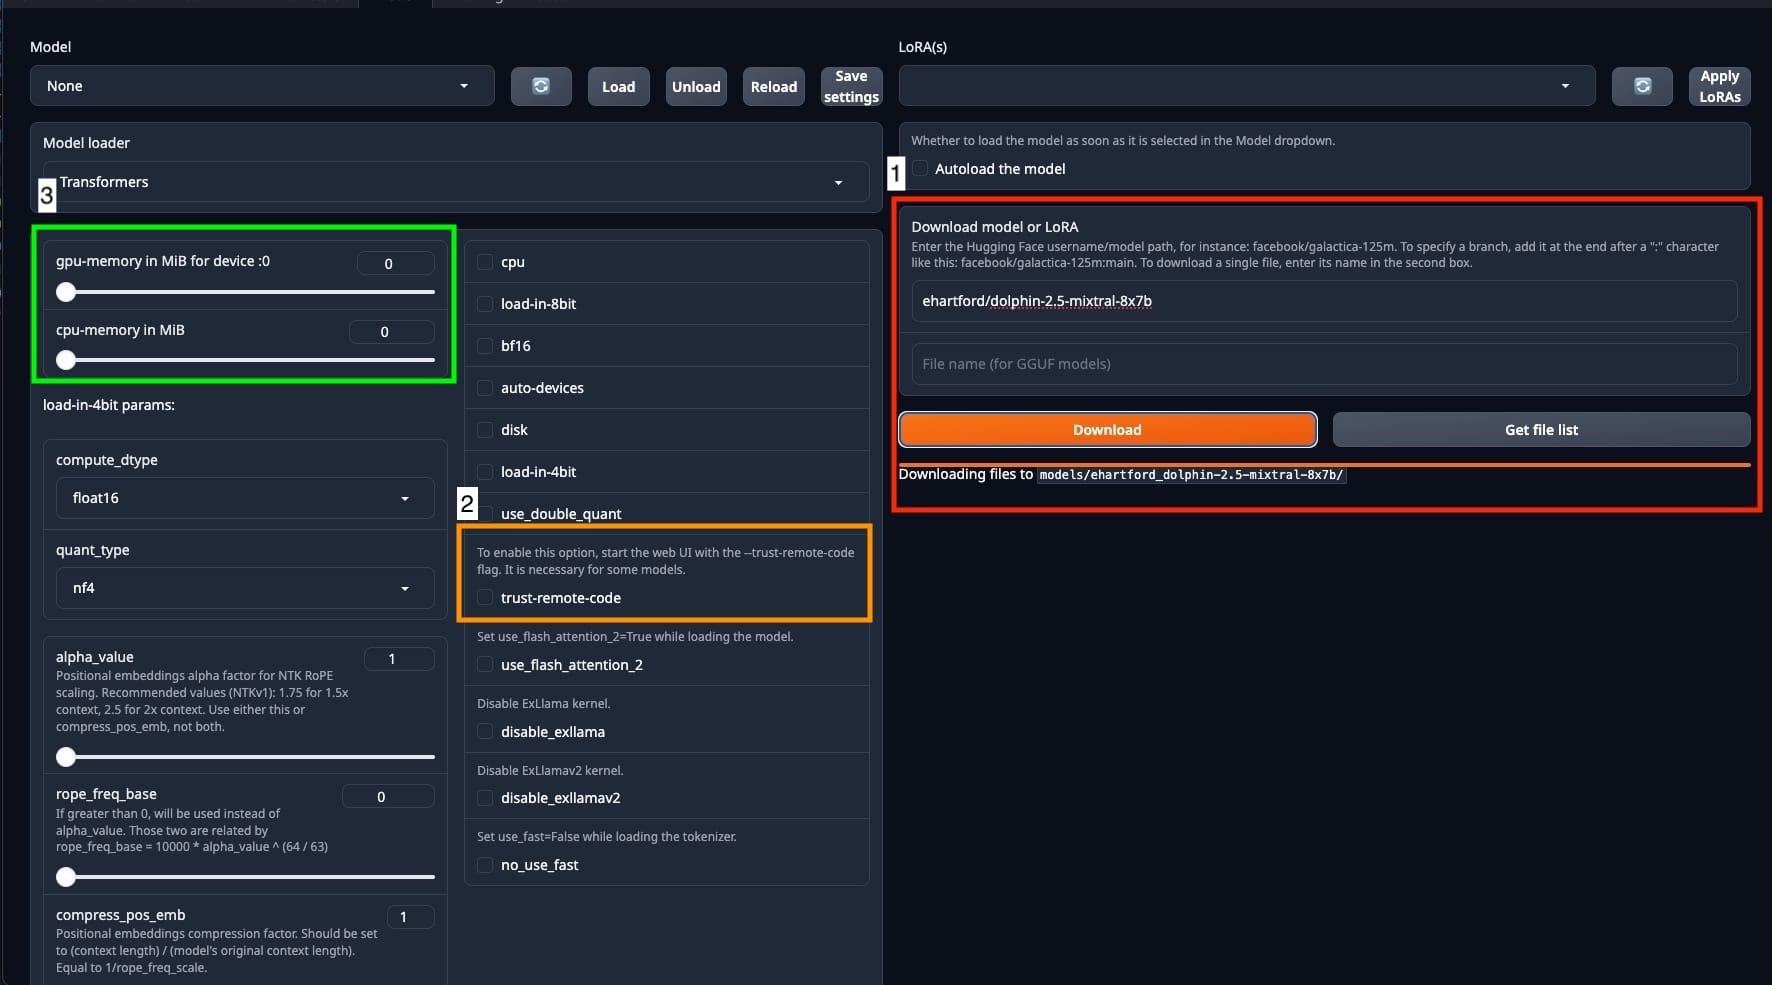
I want you to pay attention to three things in the screenshot.
- This is where we set where we downloading the model from.
- This is important, you can't toggle
--trust-remote-codefrom here. It is a disabled checkbox. We will sort this out in the next step. - The default GPU memory is set to 0, so every time you start this up you have to max this bar out for each GPU. In this case I am using a single A100. If you don't max it out a bug occurs. Max out CPU-memory as well.
Setting --trust-remote-code & viewing logs
With the model download underway, it's time to flex your tech muscles in the terminal. We're going to tweak the start docker shell script. Me? I will use Vim here. But you? Use whatever tool you're comfortable with. And no, I'm not going to hold your hand through a vim tutorial. There's a whole internet out there for that.

ls in the default root directorySo, open run-text-generation-webui.sh. Find that line where ARGS is being set. Here's where you add --trust-remote-code right after --listen. Save your changes. We're setting the stage for a grand restart once our model finishes downloading. This little trick will flip the unselectable "trust-remote-code" in the GUI to 'enabled' later.
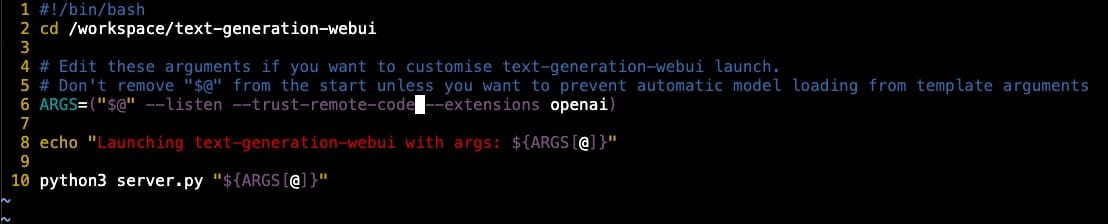
--trust-remote-code flagBut wait, there's more. Let's add a bit of comfort to our tech adventure. We're going to monitor the log file.
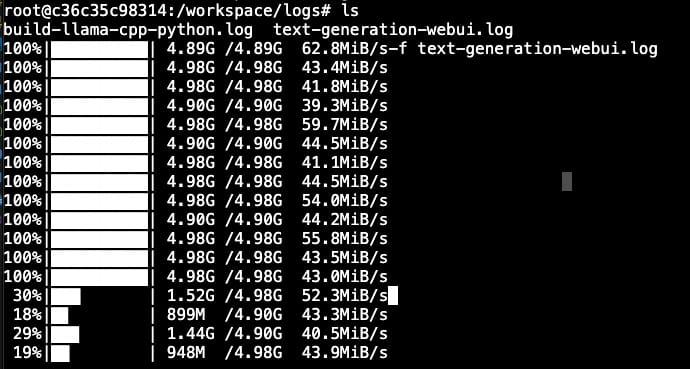
Use ls to check your surroundings. Then, dive into the logs directory with cd logs. Peek around again with ls. Found the file? Good. Now, let's tail it – and don't forget the -f flag. You want the command tail -f text-generation-webui.log or, from the root, tail -f logs/text-generation-webui.log
And now, we wait. The suspense is killing you, isn't it? Once the download finishes, we'll need to restart the docker for our remote code command to kick in. The easiest way? Go back to the runpod site, stop the instance, and give it a fresh start.
Loading up the Model & Additional Settings
So, you've given your docker, service, or instance a fresh start – whatever floats your boat. Now, it's time to relaunch that web UI and head straight to the 'model' tab. But hold your horses – before you select the model, make sure that GPU memory bar is maxed out. There seems to be a bug if it's set to 0.
Make sure "Model Loader" is set to "Transformers".

Now, about the 'autoload' option – I don't use it, but feel free to try it.
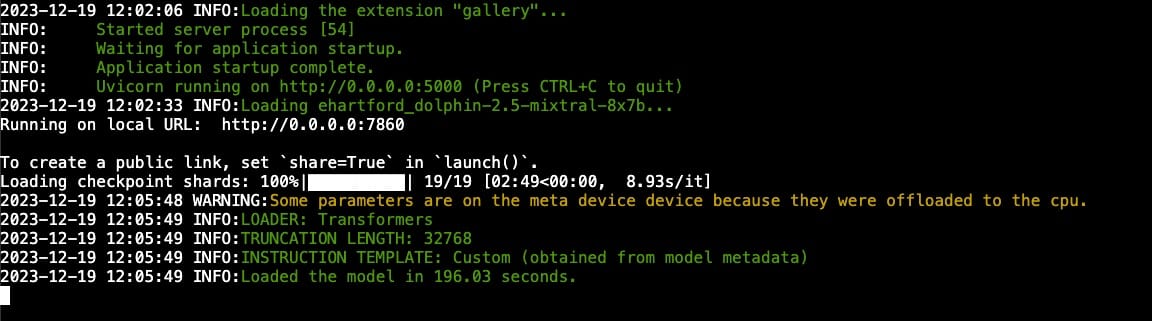
Loading the model is like watching paint dry, but less exciting. So, remember our little log-tailing trick? Time to bring that back. It's like having a backstage pass to the show.

Here's the checklist: Ensure the 'Model loader' select box is set to 'Transformers'. Check the remote code box – if it's unchecked, you goofed up earlier or didn't restart the instance properly. Once everything looks good, hit 'Load model' and then... wait. The UI won't give you a peep about what's happening. You must tail the log to get the scoop.
Oh, and a little heads up – I've had a 100% failure rate on the first model load attempt. If it crashes and burns, the logs will show it. Don't panic. Just reload the web UI, hit 'Load model' again, and cross your fingers. Maybe you'll get lucky and nail it on the first try. The cause of this could be because I keep forgetting to adjust the sliders.
Instruction Template
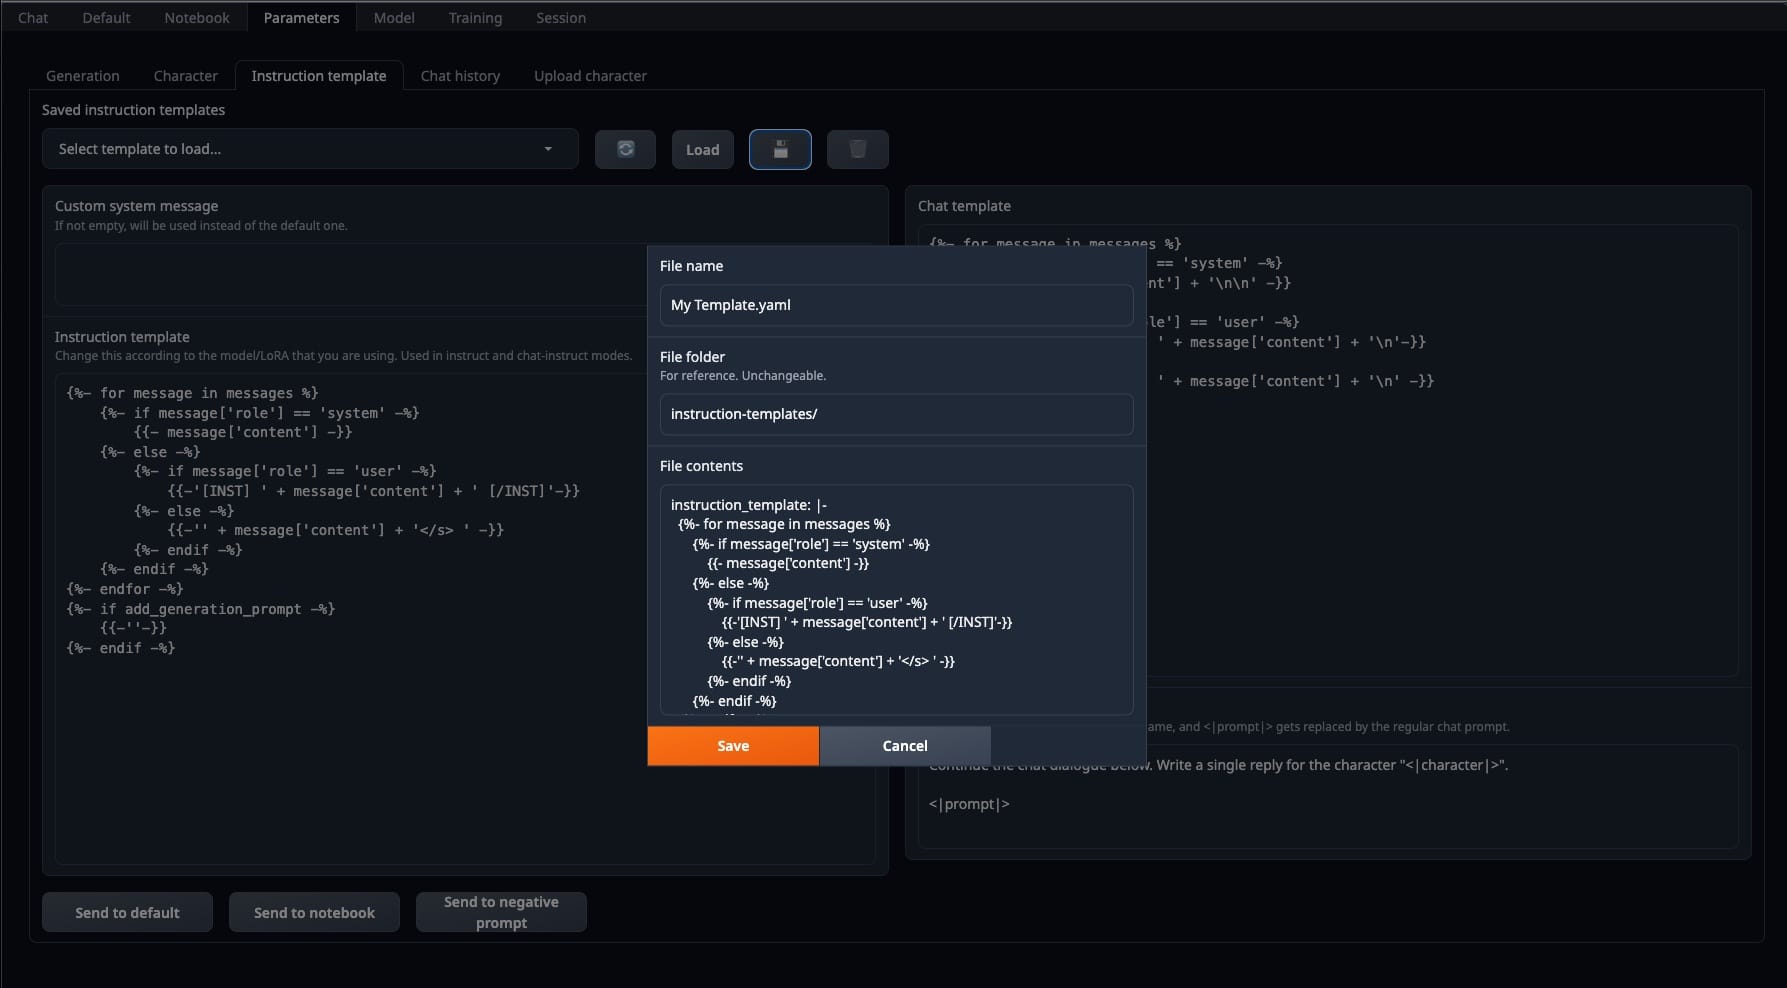
This is important. Once the model has been loaded, make your way to "Parameters" section and then select "Instruction template".
Find "Mistral" in the select box and click "Load". (Remember this is based on Mistral)
I believe this is important
{{-'[INST] ' + message['content'] + ' [/INST]'-}}Note: I haven't even dared to try this setup without selecting a template. Why? Because, believe it or not, I actually read the documentation. Shocking, I know. I also peeked at other people's code, like this gem: https://huggingface.co/spaces/openskyml/mixtral-46.7b-chat/blob/main/app.py. So, yeah, this step was as obvious to me as the fact that water is wet. But you may forgo this step and see what the outcome is.
And that is it, you can now head to the "Chat" tab and try it out!
If it tells you it's GPT-3 then you are successfully running Dolphin2.5.
Congratulations!

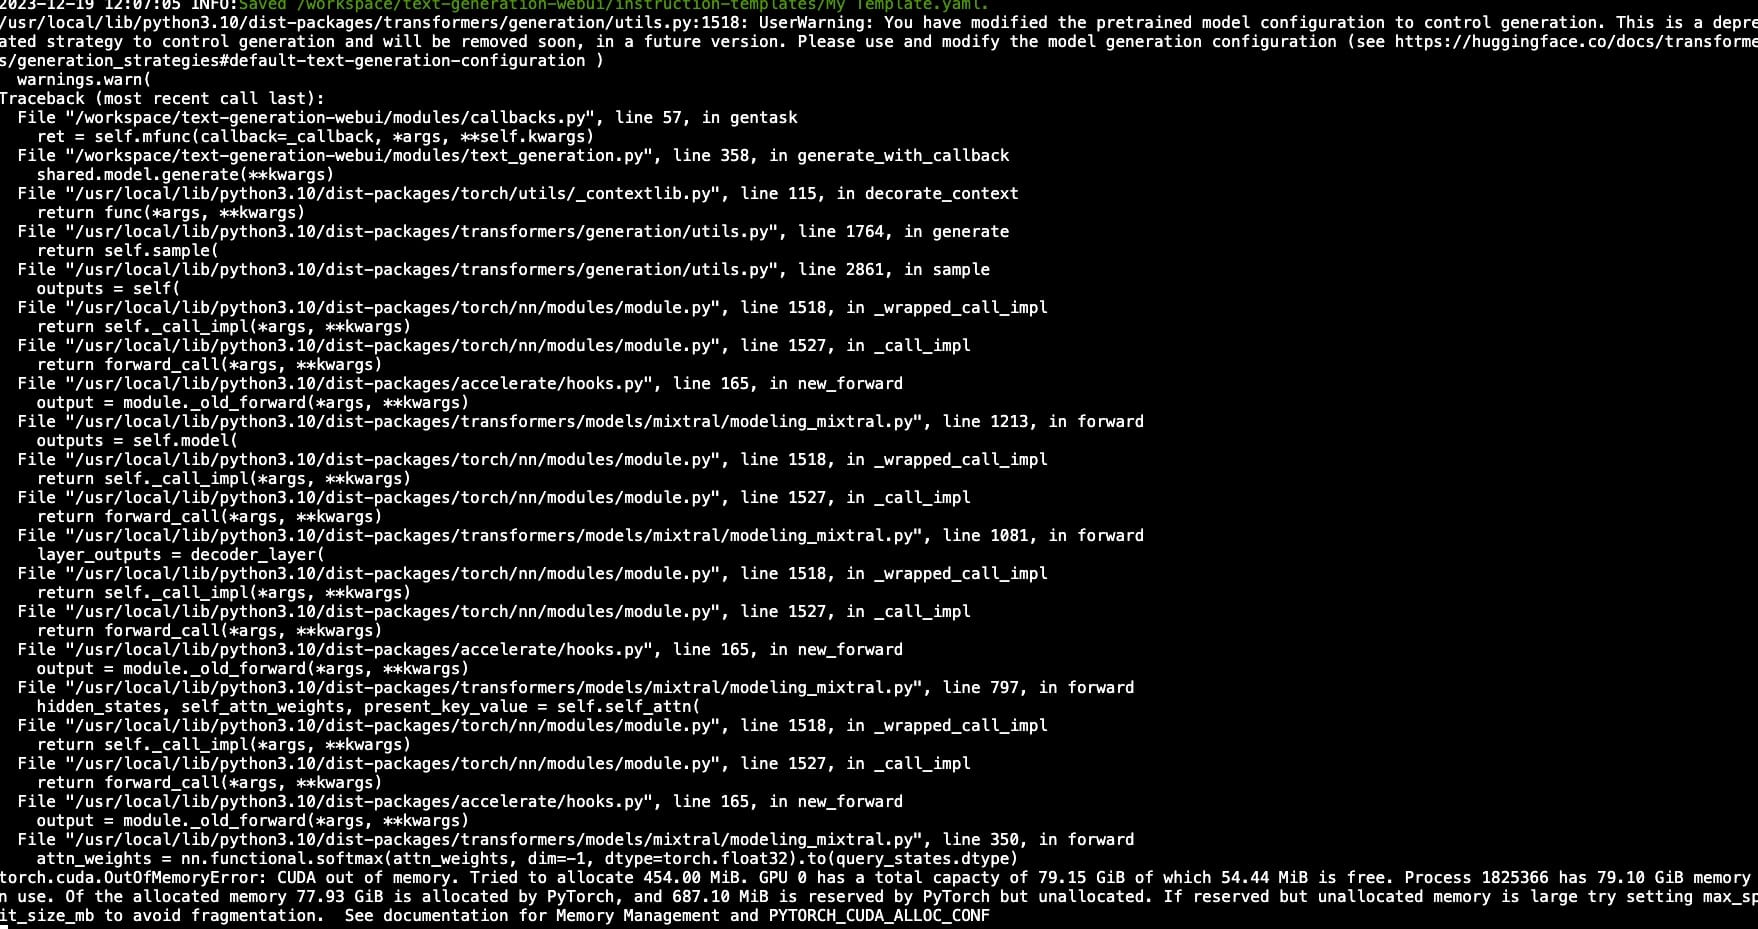
Also once you have sent a few messages back and forth you will get the legendary CUDA out of memory exception. Good times. 80GB of vram gone in a simple conversation. But on a serious note, if you want to solve this, stop the instance and when you start it up again select 2x A100 in the settings. Be sure to enable both GPUs in the "Model" tab once you have added it.
Checklist
Alright, you've somehow managed to stumble through this guide without falling asleep or running away screaming. Either way, here's a checklist for you to double-check, hopefully it helps. Use it, don't use it – your call.
Remarks
When selecting the RTX A6000 instance I had an issue where I could not select more than one GPU after creating the initial instance. I did not have that problem on the A100 instance.
Thank you to:
Eric Hartford - For the Dolphin 2.5 model
TheBloke - For the incredible Docker Image
Oobabooga - For the web UI
About Runpod: As I mentioned in the beginning, I had left over credit for Runpod so I used it to test this but Runpod's pricing is atrocious. You have to spend a minimum of $10. I'd suggest not using Runpod and use whatever has a GPU and use the Docker image.